Zentangle patterns › Beginner’s guide › Shading
Zentangle Shading with Pencil
Start by shading one Hollibaugh crossing, then try pencil shadows on woven strips, curved layers and details from a city scene.
One crossing, from ink to shadow
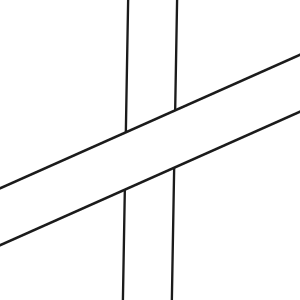
1. Find the band underneath
Look for the two unbroken edges. They belong to the top band. The band whose edges stop and resume passes underneath.
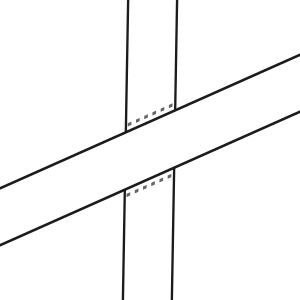
2. Place graphite at the edges
Start with light pencil strokes where the dashed marks sit, just inside the lower band. Leave the top band white.
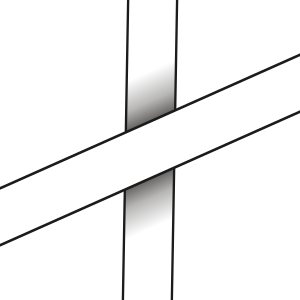
3. Blend away from the crossing
Use a blending stump or folded scrap of paper to soften the graphite away from the overlap. Leave white space beyond the fade.
If the crossing still looks flat
Put the darkest graphite right where the lower band meets the upper one. If the whole lower band has turned grey, start with a smaller patch of graphite on the next crossing and keep the fade short.
For a lighter touch, try the Zentangle team’s tip for picking up graphite with a blending stump.
Eight pencil shading exercises
Work from the line drawing first, then open the answer to compare where the shadows start and fade.
Start with one crossing
-
1. Follow the marks
Start at the dashed marks. Blend away from both edges of the top band.
Show answerHide answer for exercise 1
Use a blending stump or folded scrap of paper to soften the graphite away from the overlap. Leave white space beyond the fade.
-
2. Try it on your own
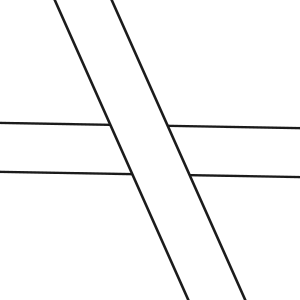
Find the interrupted band. Decide where both shadows start, then fade them into the white paper.
Show answerHide answer for exercise 2
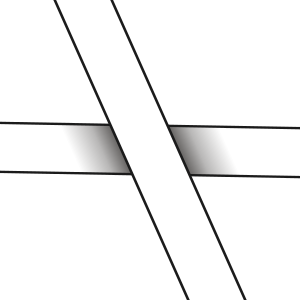
The strip that runs nearly horizontally is underneath. Shade both ends where its lines break.
Repeated crossings
Keep some white paper between separate shadows.
-
3. One strip under two
Find the same strip passing under two others. Shade all four places where it disappears or reappears.
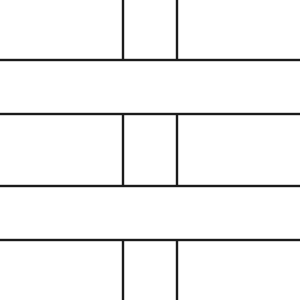
Show answerHide answer for exercise 3
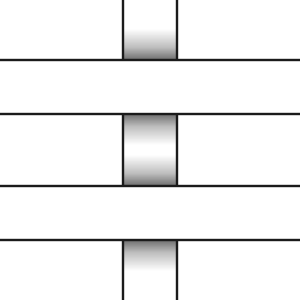
All four shadows belong on the vertical strip. Let them fade before they meet in the middle.
-
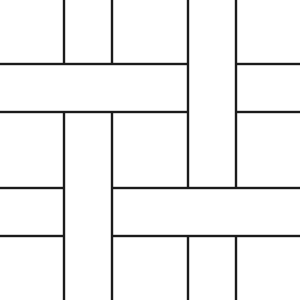
4. An alternating weave
At each crossing in this W2-style weave, find the strip underneath before you pick up your pencil.
Show answerHide answer for exercise 4
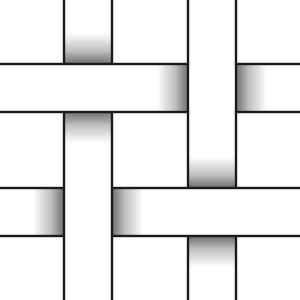
The direction changes at each crossing. Shade the vertical strip at top left and bottom right, and the horizontal strip at the other two.
Curved layers
Follow the curve of the dark edge as you place the graphite.
-
5. Shadows along auras
Shade between each black half circle and its first curved outline. Follow the edge of the black ink.
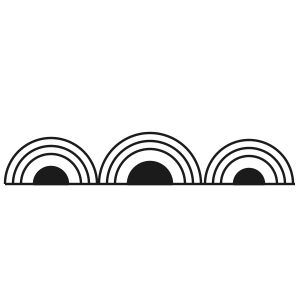
Show answerHide answer for exercise 5
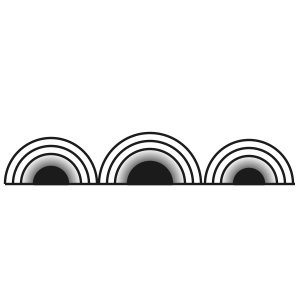
The graphite is darkest against the black half circle. Let it fade before it reaches the first outline.
-
6. A petal in front
Keep the front petal white. Add a narrow shadow on each side petal where it disappears behind the front one.
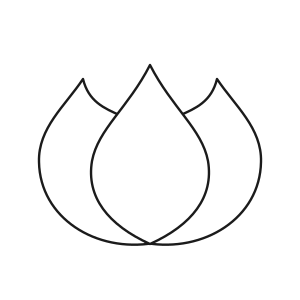
Show answerHide answer for exercise 6

Both shadows hug the curved edge of the front petal on the two rear petals. Blend outwards so their outer edges stay light.
City details
Look for the edge that casts a shadow and the surface that receives it.
-
7. Under the awning
Make the striped awning stand out from the wall. Shade the wall where the awning projects over it.
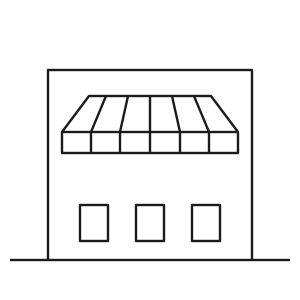
Show answerHide answer for exercise 7
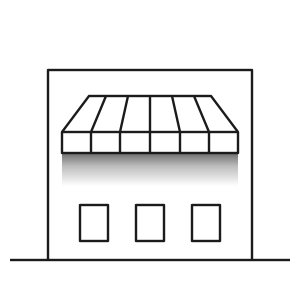
Begin on the wall at the bottom edge of the awning. Fade downwards, leaving the awning and the windows light.
-
8. Windows set back
Give the four window openings depth. Start inside each opening along its top and left edges.
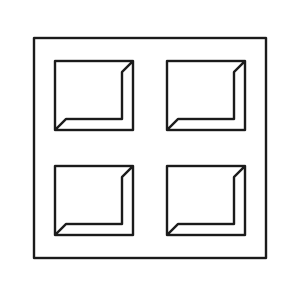
Show answerHide answer for exercise 8
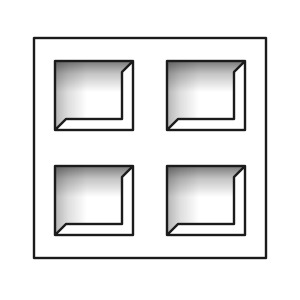
Repeat the same shadow direction in every opening. The sills and the right-hand bevels stay light, along with the surrounding wall.
Apply the exercises to a full drawing
Try the weave exercise on a full W2 tile, the curved shadows along Crescent Moon auras, or the awning shadow on a building in City at Night.